
Most people don’t start their Amazon journey with a big budget or a private label brand. They start with a clearance rack, a scanner app, and a couple of hours to spare. That’s Amazon retail arbitrage: buying discounted products in local stores and flipping them online for a profit.
Personally, I got my start flipping items from Walmart and Walgreens. I wasn’t trying to build a brand, I just wanted to make some extra money while I was in college. It worked, and it still does. Even now, retail arbitrage remains one of the fastest and most accessible ways to start an Amazon business.
In this guide, I’ll walk you through how retail arbitrage works in 2026, which tools are worth using, how to find profitable products, and the mistakes I’ve seen trip up new sellers. Let’s get started.
What is Amazon Retail Arbitrage?
Amazon retail arbitrage is a business model built around a simple idea: buy low in retail stores, sell higher on Amazon. You’re looking for products on clearance or deep discount, think stores like TJ Maxx and Ross, then listing those items for a profit on Amazon.
It’s that simple. You don’t need to invent anything or find a supplier. If there’s a price gap between a retail shelf and an Amazon listing, there’s potential profit. The goal is to pocket the difference after covering Amazon’s fees and shipping costs. For beginners, this is one of the easiest ways to get started without a big upfront investment or the need to build a brand from scratch.
How It Works on Amazon
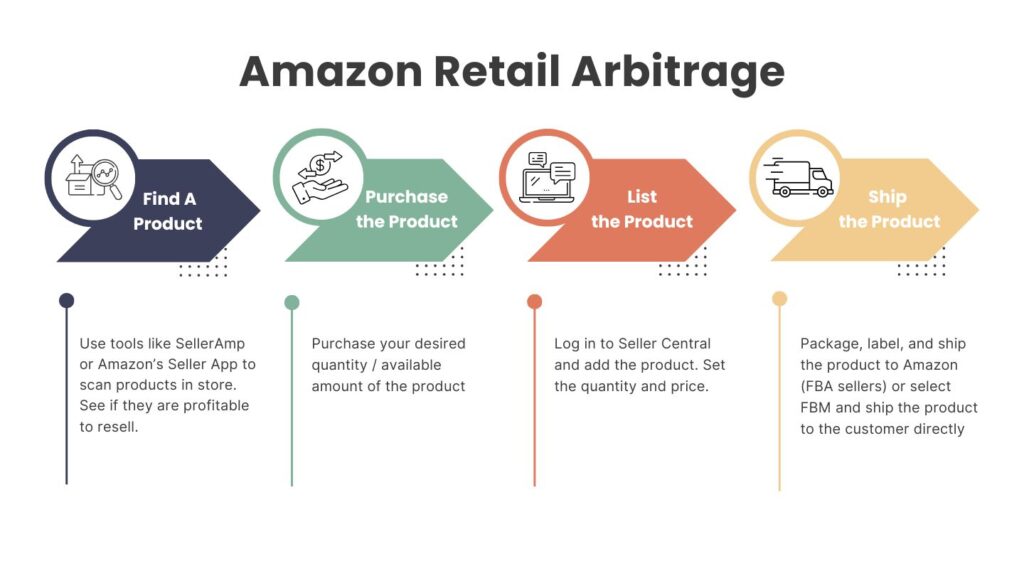
At its basic form, RA works like this: you walk into a retail store and scan barcodes using an Amazon scanner app. The app tells you if the item is already listed on Amazon, what it’s selling for, and how competitive the market is. If the numbers work, and your ROI hits your target, you buy the product, bring it home, and list it for sale.
While you have the option to ship the product directly to the customer yourself, most sellers use Fulfillment by Amazon (FBA), which means Amazon stores, ships, and handles any customer service. That frees you up to focus on sourcing new inventory and growing your business.
Is It Legal?
The answer is, yes, Amazon retail arbitrage is 100% legal. In the US, the first-sale doctrine gives you the right to resell items you legally bought, as long as they’re in new condition.
That said, legal doesn’t mean friction-free. Amazon has product guidelines and brand protection policies. Some brands require approval before you can list them, and Amazon also restricts or “gates” certain product categories like grocery or beauty.
But don’t worry, the process to get ungated is fairly straightforward. If you want more information, I’ve made a full guide to getting ungated that walks you through the entire process with tips on how to get approved faster.
Why Sellers Choose Retail Arbitrage
Before you decide to dive into the world of RA, it’s important to make sure it’s a good fit. While it’s definitely one of the quickest ways to get started on Amazon, it’s not without its drawbacks. Let’s quickly break down the major pros and cons of operating as a retail arbitrage business on Amazon.
Pros
- Low startup costs: The number one benefit of retail arbitrage is that you don’t need a big budget to get started. Many sellers start with just $100–$500. There are no overseas suppliers or branding costs upfront. You’re simply buying discounted products from retail stores and listing them on Amazon.
- Fast Turnaround: Speed is another major advantage. You can buy inventory today, list it tonight, and start seeing sales within a few days. There are no long lead times or manufacturing delays. As long as you’re priced competitively and the product has demand, you can start making sales almost right away.
- Flexible Schedule: You can fit sourcing around your life, whether that’s evenings, weekends, or even lunch breaks. Some sellers plan regular store runs into their weekly routines. This makes retail arbitrage a great “side hustle” that you can easily scale as you go.
- Proven Demand: You’re selling existing products with proven demand. That removes a huge layer of guesswork compared to launching a private label product. Also, if for some reason a product doesn’t sell, you’re usually out just a few units, not thousands of dollars.
Cons
- Difficult to Scale: Retail arbitrage is very hands-on. You have to find the deals, buy the inventory, prep it, and send it to Amazon. Scaling usually means hiring help for sourcing or prep, and even then, inventory isn’t always easy to replenish. Unlike wholesale or private label, there’s no easy way to restock a winning product.
- Inventory Can Be Unpredictable: This goes hand-in-hand with our previous point. Retail store inventory is hit or miss. One week, you might score a full cart of great products, the next, you walk out empty-handed. Building a catalog of consistent sellers is tough when your inventory depends on local store availability.
- High Competition and Price Wars: You’re not the only one looking for profitable clearance items. When several sellers jump on the same listing, prices can quickly tank. You’ll need to constantly adjust prices and monitor sales trends in order to stay profitable and make consistent sales.
- Brand and Category Gating: Many popular brands and categories are restricted, and getting ungated isn’t always simple. Even with a store receipt, Amazon may reject it as valid proof. That can get frustrating fast, especially if you’ve already purchased inventory only to find out you’re not eligible to sell it.
Retail Arbitrage vs. Wholesale & Private Label
Before we go any further, it helps to understand how retail arbitrage compares to wholesale and private label, two of the other most common business models on Amazon.
Private label means creating your own branded product and having it manufactured, usually overseas. It offers high upside and long-term scalability, but you’ll need significant startup capital, time, and experience. It also carries a lot more risk. You’re investing in bulk inventory without knowing how well it will sell, and any production or shipping delays can sidetrack your entire business.
| Business Model | Startup Cost | Scalability | Workload | Risk Level |
|---|---|---|---|---|
| Retail Arbitrage | Low ($100–$500 to start) | Hard to scale solo without hiring help | Very hands-on. Time intensive | Low |
| Wholesale | Medium ($2K–$10K+) | Highly scalable with good supplier relationships | Admin heavy. Lots of emails, paperwork, and account management | Medium |
| Private Label | High ($5K–$15K+) | Highest potential if your product sells well | More complex. Involves design, branding, and marketing | High |
Wholesale involves buying brand-name products in bulk from authorized distributors or manufacturers. It’s more stable and scalable than retail arbitrage because you can reorder inventory reliably and build ongoing supplier relationships. But the barrier to entry is higher. Getting approved for wholesale accounts takes time, and you’ll often need to place larger orders, provide business documentation, and meet minimum purchase volumes.
RA stands out because it bypasses all of that. You don’t need supplier relationships, business accounts, or months of planning. You’re simply taking advantage of price gaps between retail stores and Amazon. The summary is that retail arbitrage is faster and cheaper to start, but harder to scale. Wholesale and private label take a larger up-front investment, but offer more long-term stability and are easier to scale.
Is Amazon Retail Arbitrage Worth It in 2026?
In my opinion, yes, retail arbitrage is still worth your time. Despite the growing number of sellers and tighter policies, there are still plenty of profitable deals out there. Retail pricing inefficiencies haven’t disappeared, and many sellers are making a full-time income through the business model.
That said, there’s no denying it’s getting more competitive. You can’t just walk into any store and expect to walk out with gold. You need to be efficient with your time, track your numbers, and be picky with what you buy.
Retail arbitrage isn’t a passive income stream, but it’s still one of the fastest and lowest-risk ways to start selling on Amazon. It teaches you how the platform works, what products move, and how to manage cash flow, all skills that transfer well into more advanced business models down the road.
Must-Have Tools & Software
While retail arbitrage remains very budget-friendly, there are a couple of paid tools I highly recommend, along with a third tool I suggest you get once you’ve made a few sales.
Keepa
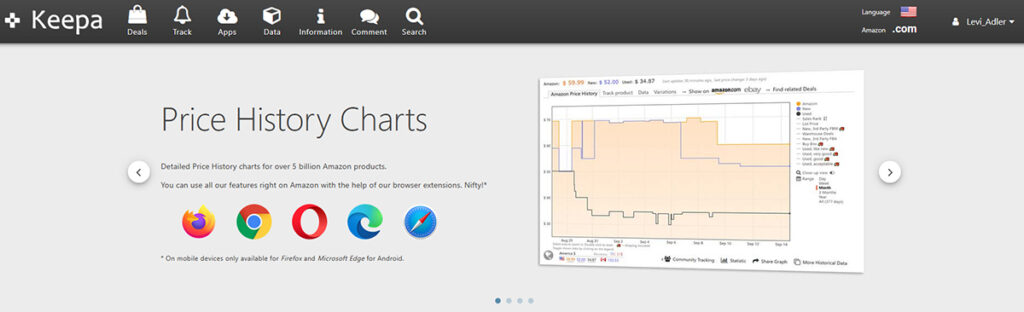
I won’t sugarcoat it: if you’re doing retail arbitrage, you need a Keepa subscription. This $20/month tool is the single most important asset in your sourcing toolkit. While scanning apps show you a product’s current sales rank or price, Keepa shows how that listing has behaved over time.
You can use Keepa to:
- View Buy Box price trends over weeks or months
- Track sales rank drops, which often indicate actual sales
- See if Amazon is on the listing, and whether they share the Buy Box
- Monitor the number of competing sellers over time
- Understand whether a price is stable or inflated due to short-term demand
- Analyze variations and see which ones are actually selling
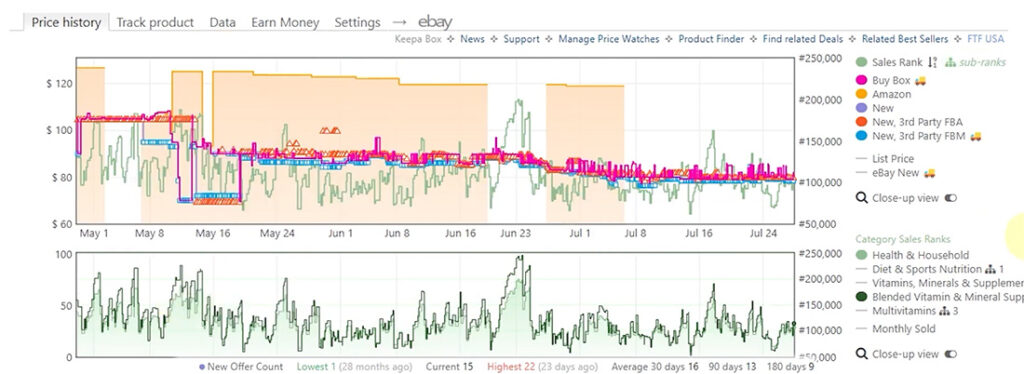
Always check the 3-month and 1-year views before buying inventory. This helps you avoid buying products that look good today but have a bad long-term track record. Keepa also integrates with tools like Seller Amp, making it even easier to access critical data on the go.
Scanner Apps
The second tool I highly suggest you invest in is a scanner app. These are the apps that you’ll download onto your phone in order to scan products in-store. If you’re on a budget, the Amazon Seller app is a great starting point. It’s completely free, shows you fees and profitability, and tells you if you’re eligible to sell an item. In other words, it gives you all of the basic information you’ll need to launch your business.
However, once you start to make sales, investing in a third-party scanner tool can drastically speed up your sourcing process. There are many apps on the market, but the two I recommend are SellerAmp (SAS) and Scoutify:
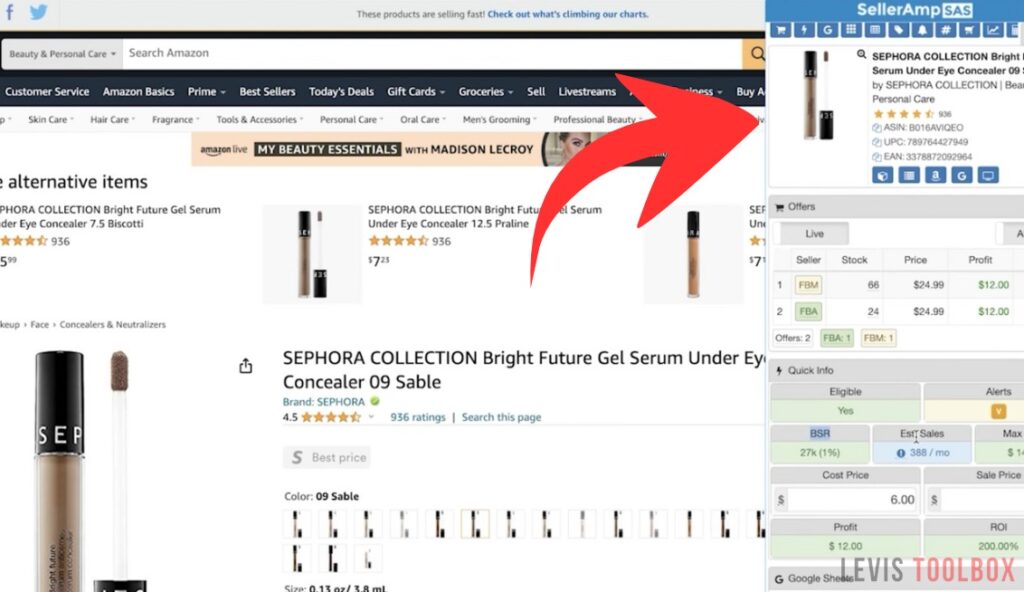
- SellerAmp gives you real-time profit breakdowns, BSR data, Buy Box ownership, ROI calculators (including sales tax and shipping), and Keepa integration. It’s an all-in-one research tool that works both as a mobile app and a browser extension.
- Scoutify is a similar tool that lets you set custom buy triggers, see restriction alerts, and scan items into buy lists. It’s also part of the Seller 365 bundle, which includes InventoryLab, Smart Repricer, and 7 other Amazon tools.
From my own experience, the main reason to invest in either one of these tools is the time-saving they provide. When I’m using SellerAmp in-store, I can quickly see whether a product is profitable, how often it sells, whether Amazon is on the listing, whether I’m eligible to sell the product, whether there are any IP or copyright warnings related to the product, and more, all from a single screen. For me, that convenience was well worth the investment.
Repricers
Once your inventory grows, you’ll realize you don’t have time to manually adjust prices all day. That’s where a repricer comes in. These tools will automatically adjust your prices based on rules, algorithms, or AI, helping you stay competitive and win the Buy Box while freeing up more of your time.
There are literally dozens of repricers to choose from, but here are a few options:
- BQool is one of the most popular repricers for new and intermediate sellers. It’s affordable (starting at $25/month) and offers both rule-based and AI repricing to help you strike the right balance between profit and speed.
- Aura uses true AI technology to balance between winning the buy box and maximizing profit. They have incredible customer support and a very affordable pricing tier for new or beginner sellers.
- Smart Repricer is a newer tool to market, included in the Seller 365 bundle I mentioned earlier. With both rule and AI repricing options, automation, and 9 additional tools included, the bundle is a great way to get your hands on a scanner app, an inventory tool, and a repricer for a single monthly subscription.
For full disclosure, in my business, we’re currently using Seller Snap, but we previously used Aura for around 15 months and got good results. I highly recommend it for any new to intermediate sellers. The reason we switched was simply that our business had grown to the point where it made sense to invest in a premium tool.
If you’re interested in a detailed breakdown of some of the best repricers on the market, including Aura, BQool, and Seller Snap, check out our guide on the 7 Best Amazon Repricers for 2026.
Choosing the Right Amazon Seller Account
The first step in starting your retail arbitrage business is creating your Amazon Seller account. The setup process is straightforward, but choosing the right account type is very important if you plan to take this seriously.
Amazon offers two options:
- Individual Account – No monthly fee, but you pay $0.99 for every item sold.
- Professional Account – $39.99/month flat fee, with no per-item charge.
While there are technically two choices, if you’re serious about building an Amazon business, a Professional Account is the only real option. The first reason is simple: you can’t win the Buy Box with an Individual account. That alone will kill your sales. Over 80% of purchases happen through the Buy Box, and without it, you’re basically invisible. The second reason is just as important: you can’t get ungated for restricted brands or categories. That means you’ll miss out on profitable products in areas like grocery, beauty, and health, some of the best categories for retail arbitrage. With those two major issues, trying to run this business on an Individual plan just doesn’t make sense.
To get started, head over to sell.amazon.com and begin the sign-up process. You’ll need a few basics on hand: a valid government-issued ID, your banking information, and a credit card for verification. If you’d like a step-by-step walkthrough of the entire setup, check out our full guide: How to Create an Amazon Seller Account.
Choosing Your Fulfillment Method
The next decision you’ll need to make is how you’ll fulfill orders. You have two options to choose from:
- FBA (Fulfillment by Amazon): You ship your inventory to Amazon’s warehouses. Amazon stores your products, ships orders to customers, and handles returns and customer service.
- FBM (Fulfillment by Merchant): You keep inventory yourself and handle all packing, shipping, and customer support directly.
Between the two, FBA is the more popular option. It removes most of the daily workload by outsourcing shipping and logistics to Amazon. Products fulfilled through FBA are also Prime-eligible, which can increase conversion rates and makes it easier to compete for the Buy Box. That said, FBA isn’t free. It comes with several fees, slower cash flow, and long lead times when waiting for your products to get processed and checked in by Amazon.
| Category | FBA (Fulfillment by Amazon) | FBM (Fulfillment by Merchant) |
|---|---|---|
| Workload | Easier to manage. Amazon handles packing, shipping, and returns. | Harder to manage. You handle everything yourself. |
| Buy Box Advantage | Easier to win. Amazon prefers FBA sellers in the Buy Box | Harder to win. May need lower prices to stay competitive. |
| Shipping Speed | Faster: 1–2 day Prime shipping leads to higher conversion rates. | Slower: 3–7 day shipping can lower conversion rates. |
| Fees | Higher fees. You pay many FBA fees. Includes storage, fulfillment, inbound placement, etc. | Lower fees. But you cover all shipping and packaging costs. |
| Cash Flow | Slower cash flow. Less flexible. Must wait for FBA processing and check-in times. | Faster cash flow. Can source, list, and sell a product on the same day. |
FBM gives you complete control over your fulfillment process and allows for much faster cash flow. You can buy products and start selling them the same day without waiting for them to be received by Amazon. This makes it a better option for seasonal items or anything you want to sell quickly without worrying about storage fees or shipping delays. However, it’s much more labor-intensive than FBA, with the need to prep and ship every product.
Also, due to slower shipping speeds, FBM sellers typically have a harder time winning the Buy Box and can have slightly lower conversion rates compared to FBA sellers with the Prime badge.
For most new sellers, I recommend starting with FBA. It reduces the number of things you need to manage and lets you put more time into sourcing inventory. As you gain experience, you can explore FBM for specific situations (like Q4), but FBA is usually the most efficient way to get started. For a full comparison, check out this detailed breakdown of Amazon FBA vs FBM.
How to Source Products for Retail Arbitrage
Sourcing is the backbone of your RA business and how you’ll be spending the bulk of your time. If you can reliably find profitable, in-demand products at low enough prices, everything else becomes easier. This section covers where to look and how to evaluate whether a product is actually worth reselling.
Best Stores for Sourcing Products
Not all stores are equal when it comes to arbitrage. Some chains offer better clearance, higher margins, or faster turnover. If you’re just starting out, I recommend focusing on stores that are nearby, accessible, and have a broad product mix.
Here’s where I’ve had the most success:
- Big Box Retailers like Walmart, Target, and Best Buy almost always have dedicated clearance sections. Walmart moves inventory quickly, so if you catch a markdown cycle at the right time, you can walk out with a cart full of winners. Target’s clearance is more predictable. Learn their weekly markdown schedule and plan your shopping trips accordingly.
- Discount Chains such as TJ Maxx, Marshalls, and Ross offer brand-name products at steep discounts. These stores are especially good for shoes, clothing, and beauty products. Just be aware the inventory changes constantly, so you need to scan everything, every time.
- Pharmacy Chains like Walgreens and CVS are really underrated. Their clearance items often include name-brand beauty, health, and seasonal products that resell surprisingly well.
- Dollar Stores are a great low-risk option. If you’re on a budget or just starting, scanning $1–$5 items can teach you the fundamentals without tying up too much cash.
- Thrift Stores take more time and patience, but they’re goldmines for used books, discontinued toys, and board games. You’ll need to search more manually here, but you’ll face less competition on each listing.
Other good options include Costco, Dick’s Sporting Goods, and regional discount outlets. The key is consistency. The more stores you visit, the better you get at spotting potential products and knowing what sells.
How to Analyze Potential Products
Once you find a potential product in store, you’ll need to analyze its profitability, sales velocity, and competition to see if it’s worth reselling.
Start by checking the product’s barcode using your scanner app. Depending on the software you’re using, this should pull up the Amazon listing and the product’s pricing info. From there, here’s what I recommend looking at:
- Does the product match the listing? First, double-check that the product in your hand exactly matches the Amazon listing, brand, size, version, and packaging. I’ve made the mistake of buying a bundle pack when the listing was for a single unit. You’ll want to avoid this as the pricing is often very different, and what looks like a profitable product turns out to be a wasted investment.
- Are you eligible to sell it? Next, make sure you can actually sell the item. Just because something looks profitable doesn’t mean your account is approved to sell it. If the app says “You’re not eligible to sell this product,” don’t buy it unless you’re already in the process of getting ungated. Otherwise, you’ll wind up with a bunch of extra inventory you’re not able to sell.
- Is it profitable? Use the built-in calculator to enter your cost and see your net profit after fees. I like to see at least $3 in profit per unit and at least 35% ROI. Don’t forget to factor in taxes, shipping supplies (if using FBM), and returns. If you don’t have a paid product research tool, use a free tool like our Amazon Profit Calculator.
- Does the product make consistent sales? The Best Seller Rank (BSR) tells you how fast something sells. Lower is better. I typically aim for products ranked under 200,000 when starting, though some categories (like shoes or clothing) can support higher ranks. SellerAmp or Keepa can also show estimated monthly sales, ideally, you want to choose products with 30+ monthly sales to avoid the possibility of long-term storage fees.
- How competitive is the product? Check how many sellers are on the listing. If Amazon is one of them, check whether they’re sharing the Buy Box or holding it 100% of the time. If they’re not sharing, it’s usually best to skip that product. Keepa’s graph can also show you how the number of sellers has changed over time. If more sellers are joining and the price is dropping, it’s often a sign of a price war, which is another signal that you may want to avoid that item.
- Does it have a steady price history? Keepa is your best friend here. You’re looking for price stability. If the current price is temporarily inflated, it’ll likely crash once more sellers jump on. You want a listing where the Buy Box price holds steady and there’s room to profit even if it drops a little.
- Which variations sell best? If the product has different sizes or colors, use Keepa or the review count trick to figure out which variations make the most sales. Some colors/types might be dead weight.
The big thing is: don’t guess. Scan everything. Even items that look like they won’t sell might surprise you. And the more you analyze, the faster you’ll learn what works for your business.
Shipping Your Inventory to Amazon
If you’re using Fulfillment by Amazon (FBA), you’ll need to ship your inventory to a fulfillment center before you can sell it. It might feel overwhelming at first, but once you go through the process a couple of times, it becomes routine.
Prep and Label
Before you can ship anything to Amazon, every unit needs to be prepped and labeled properly. That means applying a scannable barcode to each item, using either the manufacturer’s UPC or an Amazon-generated FN SKU. Most sellers go with FN SKUs, which require covering the original barcode with your own label.
When printing labels, you can get started with a basic inkjet printer and 30-up label sheets, but I highly recommend switching to a thermal printer like a Rollo or Dymo as soon as you can. They’re faster, cleaner, and save you the hassle of buying ink cartridges every few weeks.
Whether you’re working from home or using a prep center, keep your workflow tight. Ideally, you want to touch each item once: prep, label, poly bag if needed, scan it into your shipment, and box it.
If you’re ever unsure how to prep a product, Amazon provides clear documentation inside Seller Central with prep guidelines by category.
Create Your FBA Shipment in Seller Central
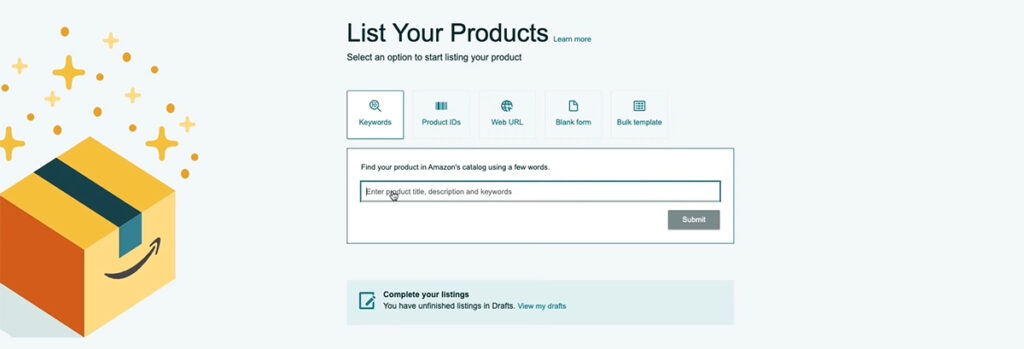
Before you can build a shipment, you need to list each product in your inventory. Go to Inventory > Add a Product, search by UPC or ASIN, and join the existing listing. Make sure the condition is set to “New” and that you’re approved to sell the item. If you’re not, skip it or apply for ungating.
Set your price based on the current FBA competition. I usually aim within 1–2% of the Buy Box, or slightly above if there’s a wide gap to the next seller.
Once your listings are live, you can start building your shipment. Use the “Send to Amazon” workflow in Seller Central or a third-party tool like InventoryLab or Boxum. I personally use InventoryLab. However, I’ve heard great things about Boxum as well.
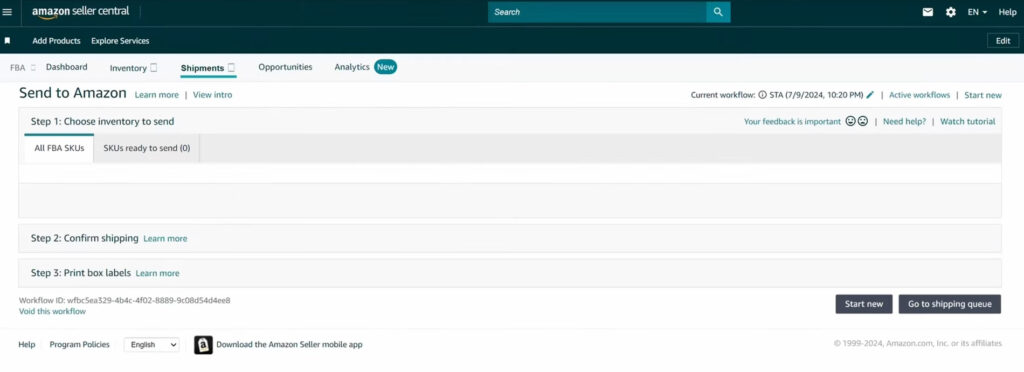
You’ll select your shipment type, Individual (mixed SKUs) or Case-packed (identical SKUs), then assign products to boxes, enter dimensions, and generate your shipment plan. Amazon will determine which fulfillment centers to send your inventory to. You can’t choose the destination or deliver it yourself. It must be shipped through Amazon’s carrier network.
Print FBA Labels & Ship to Amazon
Once your shipment is finalized, it’s time to get it out the door.
Pack each box tight but within Amazon’s weight limits, typically 50 lbs or less. Use kraft paper or other dunnage to prevent items from shifting in transit.
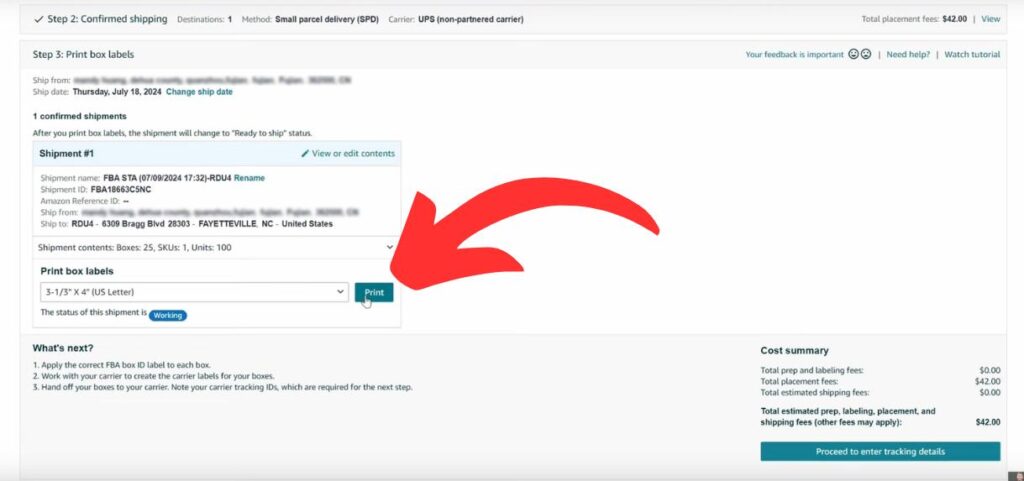
Print your FBA box labels through Seller Central or your shipping software. These tell Amazon what’s inside and where to send it. If you’re using a tool like Boxum, 2D barcodes can speed up the Amazon warehouse check-in time. However, this is completely optional.
Next, print your UPS shipping labels using Amazon’s discounted partnered rates. Costs usually range from $0.50 to $1.50 per pound, depending on how well you pack. The more units per box, the lower your per-unit cost.
Once labeled, you can drop the boxes off at UPS or schedule a pickup (usually $5–$10). Try to ship within 24–48 hours of sourcing. The faster your inventory moves, the faster it goes live, and the faster you make your first sale.
Amazon typically takes 7–10 days to check in shipments. Once your products are marked “Available,” you’re listing should be live on Amazon.
How to Scale Your Retail Arbitrage Business
If you want to grow past the point of packing boxes in your garage, you’ll eventually need help. The two biggest levers for scaling a retail arbitrage business are hiring virtual assistants and expanding into online arbitrage. These strategies free up your time, increase your sourcing volume, and allow you to compete at a higher level.
Hire a VA to Handle the Busywork
Once you’re sourcing consistently, your time becomes the bottleneck. That’s where virtual assistants come in. A well-trained VA can save you hours a day by handling tasks like entering buy lists, managing spreadsheets, and even researching product ideas.
You don’t need to go all-in right away. Start small, hire a part-time VA through a platform like OnlineJobs.ph or Upwork. Create a test project first to evaluate their attention to detail. Then build out a simple onboarding doc that covers your sourcing rules, required profit margins, and how to use your scanning software.
In my experience, the key is to give clear feedback early and often. Review their work, point out what they got right or wrong, and keep a running log of examples they can reference later. Over time, a good VA can free up your time to allow to focus on other areas of your business.
Expand into Online Arbitrage
Online arbitrage (OA) lets you source from hundreds of websites without ever leaving your desk. You’re not limited by geography, store hours, or driving time. That makes it ideal for scaling, especially when you have a VA feeding you leads or even placing orders on your behalf.
The biggest benefit of OA is leverage. You can have your VA scan thousands of products overnight, then wake up to a filtered list of potential inventory. From there, you can double-check the best opportunities, source them, and prep them for shipment either by yourself or through your 3PL.
You can still mix in retail arbitrage if you enjoy it or live near high-value stores, but OA gives you the scale you need to grow past the limits of your local market.
You don’t need to scale overnight. Start by outsourcing just one task, or having a VA find 10 potential products per day. Eventually, you’ll free up more time to focus on scaling, and that’s when retail arbitrage starts to feel less like a hustle and more like a real business.
Common Mistakes to Avoid
There’s a learning curve with retail arbitrage, and almost every new seller makes a few wrong turns early on. I’ve made plenty myself. The good news is, most mistakes are avoidable if you know what to watch out for. Here are five of the most common ones I see and how to steer clear of them:
- Only Scanning What “Looks Good”: A lot of beginners assume they can find profitable items just by looking. Don’t make that mistake. Some of the best flips I’ve found came from scanning things I would’ve never expected to sell. Clearance vitamins, obscure pet products, odd collectibles. If it has a barcode, scan it. You’re not trying to guess what will sell. Let the data tell you.
- Forgetting to Run the Numbers: Big sales can be tempting, but retail discounts don’t always equal profit on Amazon. You need to factor in FBA fees, shipping costs, and tax. Try to aim for at least $3 net profit and 50% ROI (return on investment) on each item.
- Ignoring How Fast a Product Sells: Profit alone isn’t enough. If the item doesn’t sell quickly, your money gets tied up, and storage fees start piling on. Before buying anything, check the sales history. Keepa is your best friend here. If the product has been sitting for weeks without movement, skip it, even if the profit looks great on paper.
- Buying Products You’re Not Approved to Sell: This one catches more new sellers than you’d think. You find a great product, scan it, and the margins look solid, so you buy ten of them. Then you find out you’re gated from selling that brand or category. Now you’ve got inventory you can’t move. Always check if your account is eligible to sell the item (gated or not), either in Seller Central or through your scanner app, before you buy.
- Giving Up Too Early: This business takes time. Your first few sourcing trips might be frustrating, especially if you walk out empty-handed. But those early failures teach you how to read Keepa charts, understand what your local stores carry, and overall improve your sourcing process. Keep scanning, keep learning, and don’t let one slow week shake your confidence. It gets easier and more profitable the longer you stick with it.
Frequently Asked Questions (FAQs)
What is the difference between retail arbitrage and online arbitrage?
Both retail and online arbitrage use the same business model, the only difference is where you source your inventory. Retail arbitrage involves buying discounted products from physical stores (like Walmart or Target) and reselling them on Amazon. Online arbitrage is similar, but you source products from online retailers (like eBay or Overstock) instead of physical stores.
How much money do I need to start Amazon retail arbitrage?
You can start Amazon retail arbitrage with as little as $200 to $500. Most new sellers begin small, buying a few discounted items to resell. As you gain experience and start making money, you can reinvest to grow your inventory. There are no large upfront costs required.
Can I do retail arbitrage without using FBA?
Yes, you can do retail arbitrage without using Fulfillment by Amazon (FBA). Instead, you can use Fulfillment by Merchant (FBM), which allows you to handle storage, packing, and shipping yourself. However, the downside is that FBM sellers have a much more difficult time winning the buy box compared with FBA sellers. This can be a big problem, especially for retail arbitrage.
Is retail arbitrage really profitable?
Yes, retail arbitrage can be profitable if done correctly. Many sellers earn consistent income by finding low-priced products to flip on Amazon. Profit margins typically range from 15% to 30%, and some products can yield 50% ROI or higher. Success depends on good sourcing, pricing, and consistent effort.
Is retail arbitrage allowed in all Amazon categories?
Retail arbitrage is allowed on Amazon, but some categories and brands are restricted. You may need approval, known as “ungating,” to sell in certain areas. Always check product restrictions before purchasing and keep receipts in case Amazon requests proof of authenticity.
For a full breakdown on the ungating process, check out our guide: How to Get Ungated on Amazon: A Step-by-Step Guide
Conclusion: Is Amazon Retail Arbitrage Right for You?
Retail arbitrage isn’t passive, and it’s not magic, but it is one of the fastest, lowest-risk ways to start selling on Amazon. You don’t need a big budget or your own brand. Just a scanner, some hustle, and the willingness to learn.
If you enjoy hunting for deals and figuring things out on the fly, this business model can teach you how Amazon actually works. It taught me how prices move, how demand shifts, and how to calculate risk before spending serious money. It also gave me the cash flow I needed to launch my own brand.
But make no mistake, this takes effort. You’ve got to scan a lot of shelves and stick with it when things feel slow. If you treat it like a real business instead of a weekend experiment, it can absolutely grow into something profitable and reliable.
For me, it was the first step. It might be the right one for you, too.
Recommended Articles
- Amazon FBA vs FBM: Which Fulfillment Method is Right for You?
- How to Get Ungated on Amazon: A Step-by-Step Guide
- How to Start an Amazon FBA Business in 7 Simple Steps (Beginner’s Guide)
Levi Adler is an experienced Amazon seller, e-commerce specialist, and the founder of Levi’s Toolbox. With over a decade in the trenches selling on Amazon and managing his own Shopify stores, Levi writes from his own experience. Sharing what worked, what flopped, and the strategies he wishes he’d known sooner. When he’s optimizing listings or managing ad campaigns, you’ll find Levi hitting mountain bike trails or hanging out with his two huskies, Emma and Scout.
